


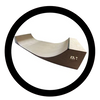
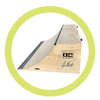
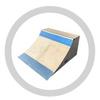




How Skate Ramp Shape Changes the Ride
The decision to make
Choose the session before you choose the dimensions. Do you want a wall to return to, a connected ramp for back-and-forth riding, a straight bank, or a line through several obstacles?
Two ramps can be the same height and still offer different skating because their transitions, widths, decks and layouts differ. This guide explains those differences so you can compare a kit, make sense of a DIY plan or describe a custom skatepark without needing to know every technical term first.
OC Ramps builds standard ramp kits as well as custom skateparks. Use the comparisons below to narrow the shape you want, then bring the team the models you’re considering and the space they need to fit. You don’t need to arrive with a finished design.

Start with a scenario: a straight bank to roll up or down, one curved transition for approaches and returns, two connected transitions for repeated back-and-forth riding, or several features that need to form one line. Once that choice is clear, compare the geometry that makes each option work. A familiar category name or a single height does not describe the complete ride.
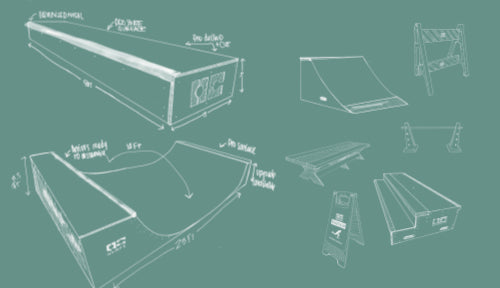
Read the drawing before the label
Match the shape to the session
| What you want to skate | Start by comparing | The important tradeoff |
|---|---|---|
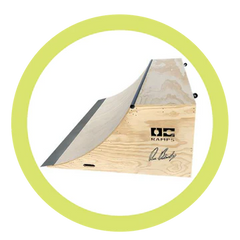
| Approach one curved wall, turn or work on coping tricks, then return into your setup | Quarter pipes | The ramp is only part of the line. You also need an appropriate approach and return on your site. |
| Ride back and forth between connected transitions | Mini ramps and half pipes | Compare the entire structure, including transitions, flat bottom and decks, rather than height alone. |
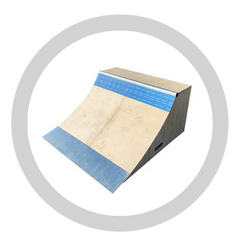
| Roll up or down a straight incline | Banks | A straight face is different from a curved transition. Choose it for the line you want, not as an interchangeable substitute for a quarter pipe. |
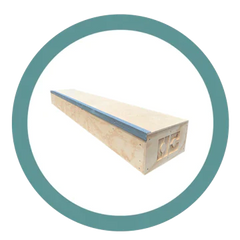
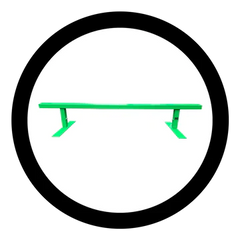
| Focus on manuals, slides or grinds | Pads, boxes, ledges and rails | Compare the intended use and approach from each direction. Taller or longer is not automatically more useful. |
| Link corners, transitions and several features around a particular site | A custom skatepark or bowl discussion | The connections matter as much as the individual features. A set of separate product photos is not a complete layout. |
Use Types of Skateboard Ramps for the broader feature overview. Keep this guide focused on how the shape changes your choice.
Names such as bank, quarter pipe, mini ramp and half pipe help you find a category. The drawing tells you which version of that category you are considering. A bank uses a straight inclined riding face. A quarter pipe or half pipe uses a curved transition. Equal height or width does not make those shapes interchangeable.
Keep every measurement with the exact model, width and options so a number from one configuration does not drift into another. Read the drawing in this order:
- Overall shape: straight bank, one curved transition, two connected transitions or separate features.
- Vertical and curved geometry: height plus the published transition shape or radius.
- Horizontal room: width, flat bottom where applicable and complete assembled length.
- Top-edge details: deck dimensions, access and coping information.
If a radius, deck depth or flat-bottom dimension is not published, leave it unknown and ask about that field. A blank value is more useful than a confident estimate from a photograph.
Height, width and transition work together
Height describes vertical scale. Transition is the curved path from the lower riding surface toward the upper section. When a product publishes a circular transition radius, a larger radius describes a broader, more gradual curve and a smaller radius describes a tighter curve. Height and where that curve ends still matter, so radius alone does not describe the complete ramp.
Width is the room across the riding face and platform. More width provides more side-to-side space for choosing and linking lines; less width can require less site width. Width does not change height, and neither measurement assigns a rider level. Compare them with the transition, complete layout and skating the rider actually wants.
- Straight incline: compare bank shapes when the intended feature is a straight riding face rather than a curved transition.
- One transition: compare quarter pipes when the rider wants to approach one wall from flat ground and return to the setup.
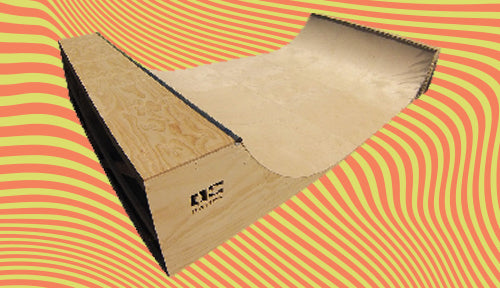
- Repeated transition riding: compare half pipes or mini ramps when two transitions and a flat bottom should form one connected structure.
- More lateral line choice: compare widths as well as the site they require; do not assume the tallest option provides the most room across the ramp.
- Matching a familiar feature: record its height, radius or curve, width, deck and coping where known, then compare the new drawing and full-ramp riding media.
Flat bottom changes the line
On a half pipe, the flat bottom is the section between the two transitions. Its length changes the distance and timing between the walls, but it does not work independently from transition shape and height. There is no universal best flat bottom for every rider or ramp.
Separate the flat-bottom dimension from total assembled length. The complete footprint also includes both transition sections and any decks. If you are comparing two half pipes, record both values. If you are considering two separate quarter pipes, the ground and spacing between them belong to your site plan and are not automatically equivalent to a connected half-pipe flat bottom.

Deck and coping affect how the feature is used
The deck is the platform at the top of a transition feature. Its depth and access affect how much platform space the selected design provides and how the rider gets into position. Coping forms the top edge used for stalls and grinds on many quarter pipes and half pipes. Its profile, placement and connection vary by product.
A shopper focused on coping tricks should not stop at ramp height; compare the published coping and deck details for the exact model. A household fitting a ramp into a garage or yard should include deck access in the layout, not only the riding face. A DIY plan must specify these parts rather than treating “add coping” or “add a deck” as complete design instructions.
Use riding media as proof
A dimensioned drawing explains the shape. Riding media shows how a person uses that shape. Use both when they are available, and make sure they refer to the same model and configuration.
- Look for the full feature, approach and return rather than one close-up trick.
- Watch more than one pass so a single edit does not become the whole comparison.
- Check that the model, width and visible layout match the specifications you are reading.
- Notice what the video does not establish, such as an unpublished radius or compatibility with another product.
Start with Types of Skateboard Ramps for category definitions. Compare Quarter Pipes for one-transition setups and Half Pipes and Mini Ramps for connected transition riding. Then use the Space and Fit guide to test the chosen configuration against the actual site.
Keep a useful side-by-side comparison
Imagine you’re choosing a feature for repeated transition sessions at home. A quarter pipe and a connected mini ramp may both put coping on your shortlist, but they don’t ask the same thing of your site.
With a quarter pipe, you approach the wall from the surrounding riding area and return into that area. With a connected mini ramp, the opposite transition and flat bottom are part of the structure. That difference should guide your shortlist before you compare dimensions or finishes.
| Decision | One quarter pipe | Connected mini ramp |
|---|---|---|
| Where does the line go? | Into and back out of one transition | Between two connected transitions |
| What needs measuring? | Ramp footprint plus the intended approach and return | Complete assembled footprint, access and space around the setup |
| What does the product drawing need to show? | Height, width, transition and deck details | Those same details, plus flat bottom and total assembled length |
| What should you ask OC Ramps? | Whether the model and your proposed riding area suit the line you want | Which configuration fits your space and the transition sessions you want |
Neither is the universal better purchase. Choose the one that creates the session you actually want and works with your property. Then use Space and Fit to turn the shortlist into a measured plan.
| Compare | Why it changes the decision | What to record |
|---|---|---|
| Intended line | Keeps the geometry tied to the skating instead of choosing by size alone. | Straight bank, one curved transition, connected back-and-forth riding, separate obstacles or a custom linked layout. |
| Height and transition | Together they distinguish vertical scale from a broader or tighter curve; one does not predict the other. | Published height, transition shape or radius, where the curve ends, exact model and configuration. |
| Width | Shows the room across the riding face and platform and the width required at the site. | Exact configured width, not the default image or another variant. |
| Flat bottom and total length | Separates timing between connected walls from the space required by the full structure. | Both dimensions for the exact half pipe; note site-planned spacing for separate quarter pipes. |
| Deck and coping | Clarifies platform space, access and the top edge the rider will use. | Published deck depth, access details, coping profile and connection. |
| Riding evidence and unknowns | Prevents a photo, label or borrowed specification from carrying more weight than it should. | Exact-model video or photos, missing fields and the specific questions still to resolve. |
Keep construction and ride shape connected
The drawing describes the intended shape. The build plan explains how that shape is established and finished. For a kit, compare the model-specific contents, prepared parts, hardware, riding layers and assembly instructions. For a DIY ramp, use a reviewed plan that keeps every dimension and material tied to the same design. For a project with several connected features, a custom layout can resolve relationships that separate product pages cannot.
Use the Kit, DIY, or Custom guide to compare which work you want to own, the Riding Surface guide to separate geometry from finish and the Ramp Kit Assembly guide to understand the work after a kit arrives.
When you talk with OC Ramps, bring three things: the session you want, the models or features you like, and a rough sketch of your available space. If you already skate a ramp you enjoy, explain what you like about it, such as its width, transition or how the line connects.
The team can help you compare its standard kits and discuss a custom layout when the site or feature connections need a different approach. Ask about any missing dimensions rather than trying to calculate them from a riding photo. A good conversation should help you choose a workable direction, not pressure you into a bigger ramp.
Questions buyers ask about ramp shape
Tap or click a question to expand its answer.
How do I choose a ramp shape for my first home setup?
Start with the skating you want to do, then compare the complete shape: height, width, transition, deck, coping and any flat bottom. No single measurement tells you how a ramp will ride or whether it suits a rider. Use Types of Skateboard Ramps to narrow the category, then compare drawings for the exact models.
Does a taller ramp always require a more advanced rider?
No. Height changes the scale of a feature, but transition shape, width, connected layout and intended use also affect the ride. Avoid assigning a skill level from height alone. Compare the full specifications and, when available, watch the exact model being skated from several approaches. If space is tight, use the Space and Fit guide too.
Can I compare ramp geometry from photos or videos alone?
Photos and riding videos are useful for scale, context and seeing a line in motion, but they do not replace a dimensioned drawing. Compare published height, width, total length, transition and deck details for the exact model. If a radius or other dimension is not published, do not estimate it from an image. Ask OC Ramps about that specific measurement before choosing.
Why does the flat bottom matter on a half pipe?
The flat bottom separates the two transitions, so it affects the distance and timing between the walls. It is only one part of the footprint: the complete assembled length also includes both transition sections and decks. Use the drawing for the exact configuration you are considering, because a flat-bottom dimension from another size or model may not describe your ramp.
Do two quarter pipes create the same ride as a half pipe?
Not automatically. The quarter pipes' widths, transition shapes, decks, spacing and intended connection all matter, and the ground between separate ramps is part of your site plan rather than an included half-pipe flat bottom. Compare confirmed compatible configurations instead of matching products by appearance. Browse skate ramps or ask OC Ramps to compare the exact models.
When should I consider a custom ramp design instead of a standard kit?
Consider a custom path when the lines you want, available site or combination of features does not match a standard configuration. Bring a measured site sketch, the features you want to skate and any models you have compared. OC Ramps can then discuss the project without treating a photo as a final plan. Start with custom skateboard ramps.